Creating a Peptide Dilution Series: Analytical Protocols for Laboratory Research
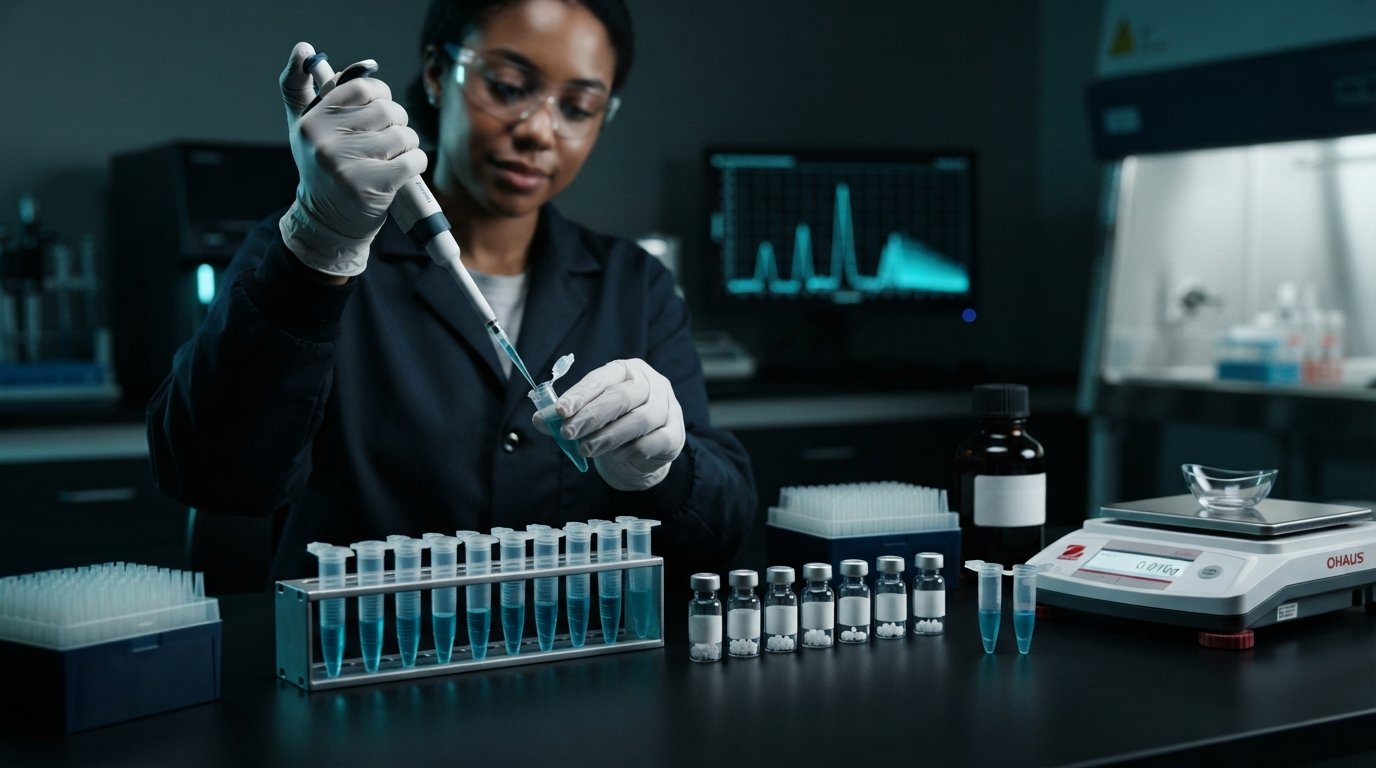
What if the primary variable compromising your research isn't the peptide's sequence, but the fluid dynamics of its dilution? In the high-stakes environment of molecular biology, the margin for error is non-existent. You understand that even a minor calculation discrepancy or the subtle adsorption of molecules to plastic surfaces can derail an entire study. Creating a peptide dilution series requires more than just basic laboratory skills; it demands a rigorous adherence to analytical protocols to ensure every aliquot maintains its intended integrity. This process is the anchor of your experimental design, requiring deep-sea precision to prevent the degradation of your high-purity compounds.
By mastering the precise methodology of serial dilution, you'll secure reproducible data and establish accurate concentration gradients across your research models. This technical guide provides the mathematical framework for C1V1 = C2V2 applications while exploring the nuances of 10-fold and 2-fold series. We'll examine the specific workflows necessary to maintain ≥99% purity throughout the process, ensuring that your starting material remains stable from the first stock solution to the final dilute. Prepare to refine your laboratory's logistical flow with clinical accuracy and unwavering methodological discipline.
Key Takeaways
- Establish a precise foundation by selecting solvents based on the peptide's isoelectric point and starting with ≥99% purity lyophilized compounds.
- Master the technical workflow for creating a peptide dilution series to ensure accurate concentration gradients across 10-fold or 2-fold scales.
- Prevent error propagation and peptide loss by utilizing low-retention plastics and rigorous pipette calibration protocols.
- Utilize batch-specific Certificates of Analysis as the primary data point for all C1V1 = C2V2 molarity calculations.
- Ensure experimental reproducibility in bioassays by maintaining chemical stability throughout the sequential transfer process.
The Fundamentals of Serial Dilution in Peptide Research
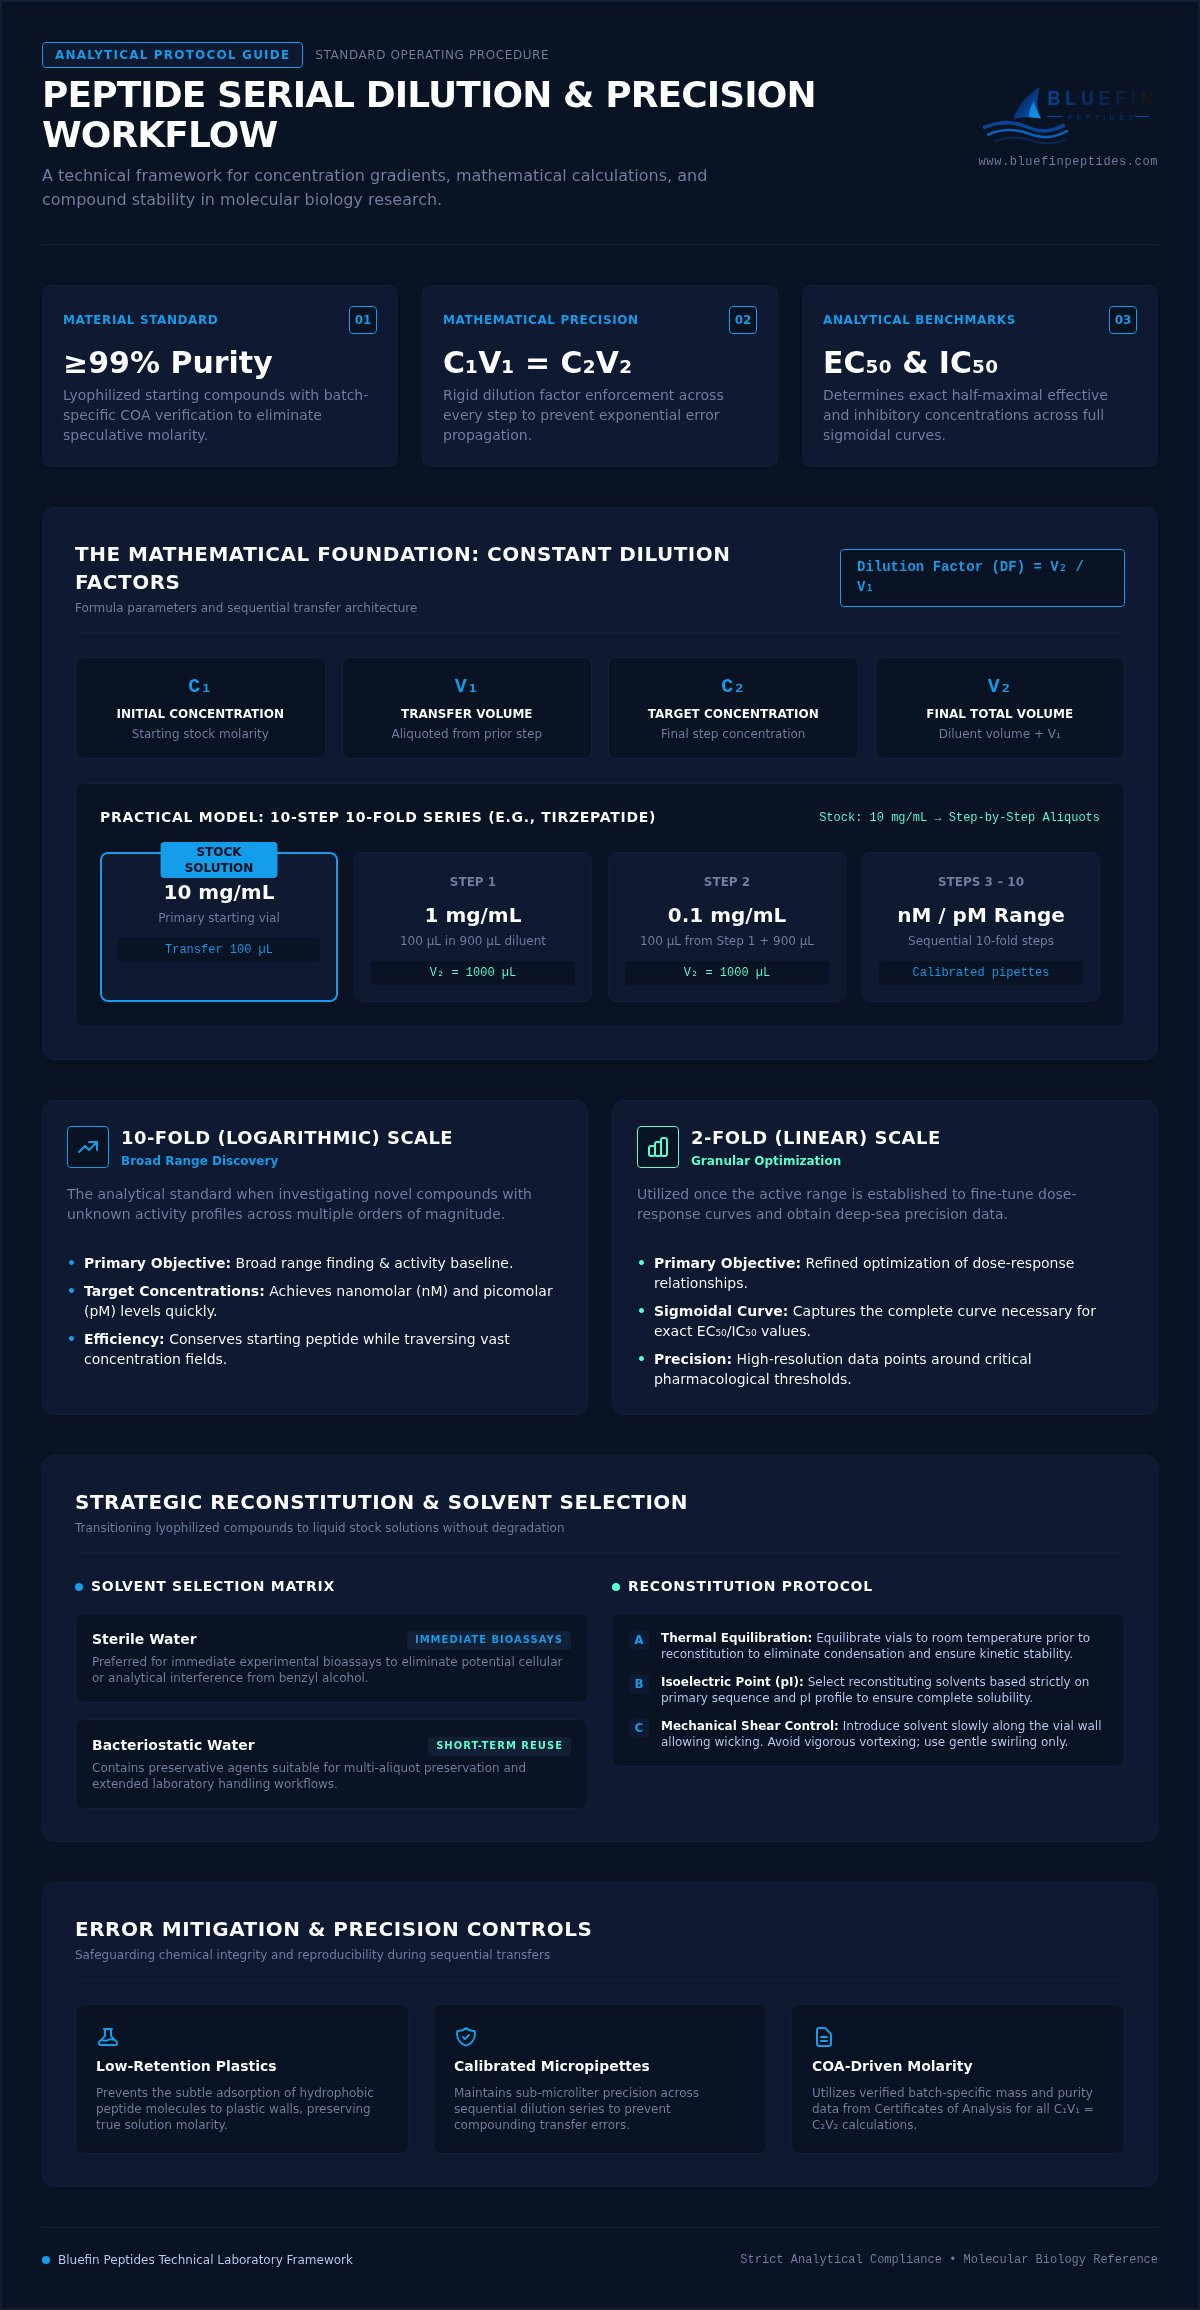
Precision is the substrate of all laboratory research. A serial dilution is a systematic, stepwise reduction of a substance's concentration within a constant volume of solvent. In the context of peptide analysis, this methodology allows researchers to traverse multiple orders of magnitude with mathematical certainty. Creating a peptide dilution series is fundamental for determining critical pharmacological benchmarks, specifically half-maximal effective concentration (EC50) and half-maximal inhibitory concentration (IC50) values. Unlike parallel dilutions, which require individual preparation of each concentration and often demand impractical volumes of solvent, the serial dilution methodology relies on a sequential transfer. This approach is superior for achieving nanomolar or picomolar concentrations while minimizing pipetting errors and conserving high-purity starting material. Maintaining these clinical currents requires equipment calibrated for sub-microliter precision to ensure the analytical integrity of the workflow.
Logarithmic vs. Linear Dilution Scales
Researchers must select a dilution scale that aligns with the specific potency of the compound under investigation. The choice between logarithmic and linear scales depends on whether the objective is initial discovery or refined optimization. When creating a peptide dilution series for a novel compound with unknown activity, a 10-fold (logarithmic) series is the standard for broad range finding. This allows for the identification of active concentrations across a vast landscape. Once the active range is established, a 2-fold (linear) series is utilized to fine-tune dose-response curves. This granular approach provides the deep-sea precision necessary to pinpoint exact potency levels. Selecting the appropriate scale is a matter of logistical efficiency; it ensures that the resulting data captures the full sigmoidal curve of the peptide's activity.
The Mathematical Foundation: C1V1 = C2V2
The integrity of a dilution series rests upon the consistent application of the dilution equation: C1V1 = C2V2. In this formula, C1 represents the initial concentration, V1 is the volume of the stock solution transferred, C2 is the target concentration, and V2 is the final total volume. The Dilution Factor (DF) is the ratio of V2 to V1, which must remain constant across every step of the series to prevent error propagation. Accuracy in these calculations is impossible without high-purity starting materials. Batch-specific Certificates of Analysis (COAs) provide the exact mass and purity data required to establish the initial molarity of the stock solution.
Consider a practical application using a 10mg/mL stock solution of a research peptide like Tirzepatide. To create a 10-step, 10-fold dilution series, a researcher would transfer 100µL of the stock into 900µL of diluent (V2 = 1000µL). This results in a C2 of 1mg/mL. For the subsequent step, 100µL of this 1mg/mL solution is transferred into another 900µL of diluent, resulting in 0.1mg/mL. This rhythm continues until the desired nanomolar range is reached. Every transfer must be executed with calibrated micropipettes to maintain the ≥99% purity standards required for reproducible data.
Strategic Planning: Reconstitution and Reagent Selection
The mathematical integrity of creating a peptide dilution series begins with the transition from lyophilized powder to a liquid stock solution. Laboratory protocols demand the use of high-purity starting materials. Without a verified mass and purity profile, molarity calculations remain speculative. Solubility is not a universal constant; it is a variable dictated by the peptide's primary sequence and isoelectric point (pI). Researchers must equilibrate vials to room temperature before reconstitution to prevent condensation and ensure kinetic stability. Navigating the depths of solubility requires a disciplined approach to reagent selection, as the choice between bacteriostatic water and sterile water depends entirely on the duration of the research model. While bacteriostatic water provides preservation for short-term reuse, sterile water is often preferred for immediate bioassays to eliminate potential interference from benzyl alcohol.
Reconstitution Protocols for Lyophilized Vials
Mechanical shear can disrupt the primary structure of a peptide chain. To preserve molecular integrity, solvents should be added slowly along the side of the vial wall, allowing the liquid to wick into the powder. Avoid vigorous vortexing. Instead, utilize gentle swirling or inversion. Determining the initial stock concentration requires referencing the batch-specific mass provided by the manufacturer. Adhering to research peptide quality standards ensures that the volume of diluent added results in an accurate molarity. Complete dissolution must be visually confirmed under adequate lighting before initiating any sequential transfers. Undissolved particulates, however microscopic, will cause significant deviations in the final concentration gradient.
Advanced Solvent Systems for Complex Peptides
Hydrophobic sequences, such as certain GLP-1 analogues like Tirzepatide or Retatrutide, often resist aqueous solvation at neutral pH. In these instances, researchers may require advanced solvent systems. Utilizing small volumes of DMSO or dilute acetic acid (0.1%) can bridge the gap between the solid and liquid states. However, the impact of pH on stability is critical. A peptide's solubility is lowest when the solution pH equals its pI. Shifting the pH slightly away from this point often facilitates rapid dissolution. For charged peptides like GHK-Cu, "stickiness" or adsorption to plastic surfaces presents a secondary challenge. Utilizing low-protein binding tubes and tips is vital for maintaining the intended concentration, especially when creating a peptide dilution series in the nanomolar range. Procuring high-purity research compounds with detailed solubility profiles is the most reliable way to mitigate these analytical hurdles from the outset.
Step-by-Step Protocol for Creating a Dilution Series
The execution phase of creating a peptide dilution series is where mathematical theory meets physical reality. Your workspace must function as a sterile theater; every instrument and reagent must be positioned to facilitate a logical, unidirectional flow. Before beginning, ensure all micropipettes have undergone recent calibration to maintain sub-microliter accuracy. Organization is the primary defense against cognitive fatigue. Labeling each tube with the target concentration and step number isn't just a clerical task. It's a critical safeguard against the propagation of sequence errors that could invalidate an entire data set. In this high-stakes environment, precision is the non-negotiable standard when creating a peptide dilution series.
Executing the Transfer Cycle
Efficiency in the transfer cycle prevents the degradation of sensitive peptide bonds. Follow this three-step rhythm to ensure consistency:
- Step 1: Aliquot the Diluent. Pre-load all secondary dilution tubes with the exact volume of diluent required by your Dilution Factor (DF). This ensures that the only variable during the sequence is the addition of the peptide itself.
- Step 2: Sequential Transfer. Introduce the calculated volume of stock solution into the first dilution tube. It's vital to change pipette tips between every single transfer to prevent carryover contamination from higher concentration wells.
- Step 3: Homogenization. Mix the solution thoroughly. While stability allows for brief, low-speed vortexing, gentle pipetting (aspirating and dispensing five times) is often safer for delicate sequences to avoid mechanical shear.
Pipetting Technique for Analytical Precision
Analytical accuracy is often lost in the "depths" of poor technique. To ensure the volume delivered matches the volume calculated, researchers should utilize the pre-wetting method. Aspirate and dispense the liquid three times before the final transfer. This saturates the interior surface of the tip and prevents the peptide from sticking to the plastic. Consistency in immersion depth is equally vital. Don't submerge the tip too deeply; stay within 2 to 3 millimeters of the surface to avoid the capillary pull of exterior droplets. Finally, always verify the meniscus at eye level. This optical alignment confirms that the fluid dynamics of your series remain within the strict parameters required for reproducible research models. Verification of the final, lowest concentration point via HPLC or downstream bioassays serves as the ultimate anchor for your experimental integrity.
Troubleshooting: Mitigating Error and Ensuring Stability
Analytical integrity is a fragile state. When creating a peptide dilution series, the most significant threat to your data is error propagation. A minor volumetric deviation in the primary stock transfer amplifies mathematically across every subsequent tube. By the tenth step, a 2% initial error can render the final concentration statistically irrelevant. Researchers must maintain a disciplined focus on the physical state of the solution throughout the workflow. Monitoring for precipitation is essential; if a peptide crashes out at high concentrations, the entire series must be discarded. Utilizing HPLC verified tirzepatide or other high-purity standards allows you to confirm that the starting molarity matches the theoretical value. This provides a secure anchor for your data before the first transfer occurs.
Peptide adsorption presents a hidden challenge in nanomolar research. These molecules often possess a high affinity for plastic surfaces, particularly as the concentration decreases. Without low-retention plastics, the effective concentration in the final tubes may be significantly lower than the calculated value. This "stickiness" is a primary cause of experimental failure in sensitive bioassays. To ensure your protocols yield reproducible results, always procure verified research materials that include batch-specific documentation to support your initial calculations.
Recognizing Common Procedural Errors
Air bubbles are the silent disruptors of micro-liter transfers. Even a microscopic void in the pipette tip displaces volume, leading to immediate concentration shifts. Precision is a requirement. Incomplete mixing between steps is the hidden cause of non-linear dose-response curves. If the solute isn't homogenous before the next transfer, the gradient fails. Navigating the currents of cross-contamination requires a stoic adherence to tip-changing protocols. Never reuse a tip between dilution steps. The cost of a plastic tip is negligible compared to the cost of a compromised research model.
Verifying the Dilution Gradient
UV-Vis spectroscopy provides a rapid method for verifying intermediate concentration points. By measuring absorbance at 214nm or 280nm, researchers can quantify the accuracy of their transfers. Running a pilot assay further confirms the expected biological response curve before committing to large-scale studies. Internal standards may also be employed to quantify dilution accuracy via mass spectrometry. These verification steps ensure that the "how" of your process remains as rigorous as the "what" of your results. Consistent verification is the only way to maintain the clinical currents of a high-performance laboratory.
Sourcing High-Purity Compounds for Precise Analytical Models
The analytical integrity of any research model is tethered to the quality of the initial lyophilized compound. Creating a peptide dilution series using materials with unknown purity levels introduces a systemic bias that no amount of pipetting precision can correct. If the starting material is only 95% pure, every subsequent concentration in your gradient is mathematically compromised from the first transfer. Molarity math relies on the absolute identity of the molecule; mass-spectrometry confirmation is the only way to verify the molecular weight with the resolution required for picomolar research. Utilizing batch-specific Certificates of Analysis (COAs) as the anchor for your laboratory calculations ensures that the theoretical concentration matches the physical reality of the solution. For time-sensitive studies, securing supply lines with US-stocked retatrutide research peptide provides the logistical speed necessary to maintain momentum without sacrificing analytical verification.
The Link Between Purity and Reproducibility
Impurities don't just dilute the concentration; they interfere with the chemical environment of the assay. Small peptide fragments or residual salts can cause non-linear data points that mimic biological variability. This interference often manifests as "ghost peaks" during HPLC analysis, masking the true concentration of the target peptide and leading to incorrect EC50 determinations. To mitigate these risks, researchers should standardize their laboratory workflows with HPLC verified research blends. These compounds undergo rigorous testing to ensure that the chemical signature remains consistent across multiple batches, providing the deep-sea stability required for long-term longitudinal studies.
Procurement Standards for 2026 Research
The landscape of peptide procurement demands transparency over marketing claims. Verifying the chain of custody and the specific storage conditions of your research supply is a prerequisite for data integrity. High-performance laboratories now require raw HPLC data rather than simple summary statements to confirm purity levels. When creating a peptide dilution series, the researcher acts as the final arbiter of quality; however, that quality is only as reliable as the source material. Reliable US-based logistics ensure that peptides aren't subjected to the thermal fluctuations common in international transit, which can induce premature degradation. Secure your laboratory's data integrity with Bluefin Peptides' HPLC-verified catalog, where every batch is documented to meet the strict analytical requirements of professional biochemistry.
Advancing Analytical Accuracy in Peptide Methodology
The success of your research models depends on the seamless integration of mathematical rigor and chemical integrity. Mastering the technical nuances of creating a peptide dilution series ensures that your dose-response curves remain statistically significant and reproducible. You've established the foundation through precise reconstitution, disciplined solvent selection, and the mitigation of adsorption errors. Every aliquot represents a commitment to data transparency. This analytical depth is only achievable when your starting materials are verified to the highest standards. Reliability. Verification. Precision. These are the anchors of a high-performance laboratory.
To ensure your gradients are built on a bedrock of absolute purity, Procure HPLC-Verified Research Peptides for Precision Laboratory Use. Our catalog provides ≥99% HPLC-verified purity, batch-specific mass-spectrometry confirmation, and US-stocked for rapid fulfillment. By eliminating the variables of impurity and degradation, you secure the clinical currents of your workflow. Move forward with the confidence that your data reflects the physical reality of your compounds and the excellence of your laboratory standards.
Frequently Asked Questions
What is the most common mistake when creating a peptide dilution series?
The most frequent error is the cumulative propagation of volumetric inaccuracies during the sequential transfer process. When a researcher fails to ensure complete homogenization at an early stage, the deviation amplifies mathematically throughout the sequence. Inconsistent pipetting pressure or failing to account for the stickiness of the molecule also leads to non-linear results. Creating a peptide dilution series requires clinical discipline during every transfer to secure the analytical integrity of the data.
Can I use the same pipette tip for the entire dilution series?
No, utilizing a single tip for the entire sequence introduces significant carryover contamination from higher concentration wells into lower ones. This practice invalidates the mathematical certainty of your dilution factor. Researchers must discard and replace the tip after every transfer and mixing cycle. This ensures that only the intended volume of the solute enters the next diluent volume, preserving the precise concentration gradient required for professional laboratory research.
How do I choose between a 1:10 and a 1:2 dilution factor?
Select a 1:10 logarithmic factor when conducting initial range-finding studies to identify the broad activity spectrum of a research peptide. This approach allows for the efficient exploration of multiple orders of magnitude. Conversely, a 1:2 linear factor is utilized for fine-tuning dose-response curves once the active range is established. This granular method provides the deep-sea precision necessary to determine exact EC50 or IC50 values with high resolution.
Does the type of plastic tube used affect the accuracy of the dilution?
Yes, the chemical nature of the plastic significantly impacts concentration accuracy due to peptide adsorption. Standard polypropylene tubes often exhibit stickiness, where peptides bind to the surface through hydrophobic or electrostatic interactions. This phenomenon is particularly problematic at nanomolar concentrations. Utilizing low-retention or low-protein binding plastics is essential when creating a peptide dilution series to ensure the solution accurately reflects the intended molarity without losing mass to the container walls.
How long are diluted peptide solutions stable for laboratory use?
Diluted solutions are generally less stable than concentrated stocks and should be prepared immediately before use. Peptides in solution are susceptible to oxidation, hydrolysis, and microbial degradation over time. While a lyophilized powder with ≥99% purity remains stable for long periods, its dilute liquid counterpart often degrades within hours or a single day. For the most reproducible results, researchers should execute their bioassays shortly after completing the dilution workflow.
What should I do if my peptide is not fully soluble in the initial diluent?
If undissolved particulates remain, first ensure the vial has equilibrated to room temperature. You may need to adjust the solution pH away from the peptide's isoelectric point to facilitate solvation. For hydrophobic sequences, utilizing a small volume of DMSO or 0.1% acetic acid as a primary solvent often bridges the gap. Visual verification of a clear solution is a prerequisite before initiating the first transfer of your stock solution.
How do I calculate the concentration of the final tube in a 5-step 1:10 series?
Calculate the final concentration by dividing the initial stock molarity by the dilution factor raised to the power of the number of steps. In a 1:10 series across five steps, the total dilution is 100,000-fold. For example, a 10 mg/mL stock solution results in a final concentration of 100 ng/mL. Maintaining mathematical confidence in these calculations is vital for ensuring that your research models remain grounded in verifiable data.
Why is HPLC-verified purity critical for creating a dilution series?
Dilution accuracy is mathematically impossible if the starting mass includes significant impurities. When creating a peptide dilution series, your C1V1 = C2V2 calculations assume the starting material is the pure target compound. Materials with lower purity levels introduce ghost peaks and incorrect molarity, leading to systemic errors in potency measurements. Bluefin Peptides provides HPLC-verified compounds to ensure your stock solution serves as a reliable anchor for every subsequent laboratory calculation.
For laboratory research use only. Not for human or veterinary use. This content is educational and does not constitute medical, dosing, or usage guidance.
Browse the BLUEFIN catalog